
 My floating garden and containers produce things we eat fresh. The trick is, to get our garden goodies to come in when we need and can use them and right now we are getting a good combination of items to eat.
I pulled my onions in mid-July and cured them for storage. This year's crop was pretty puny, so they are already almost gone. Same goes for zucchini, but my bell peppers and tomatoes are producing well. What better way to combine these items than on skewers to go with BBQ beef ribs. They are so easy to prepare. I use a little oil and rice wine vinegar mixed with Lawry's Lemon Pepper (I use this for just about everything) and my own dried herbs I call Margy's Mix. I cut the veggies into bite-size chunks and let them marinade for several hours. When the meat is about half done, the skewers go on the grill set on medium. We use the leftover marinade to baste them while cooking for extra flavour. About 10 minutes on each side gets them al dente, just the way we like them, a fresh gastronomic delight. -- Margy
 This year I grew potatoes in three places. The first was up on the hill using soil I've composted over the years. It's pretty dry up there, but I do get quite a few spuds if I am diligent about watering. My potato success story is growing them in barrels on the cabin deck. This year I grew two types, Norland red potatoes in one barrel and Yukon Gold potatoes in another.
 This week I dug up my potatoes to store for later use. Here are the Yukon Golds. I dried them outdoors before wiping them clean with a dry paper towel. Rather than keep them wrapped in newspaper in a bucket like last year, I bought plastic baskets at the Dollar Store that fits nicely under the bed downstairs. That is the coolest place in the cabin, so I use it as "root cellar."
In winter, I cook potatoes inside the fire box of my wood stove. But now that it's summer, the BBQ is the quickest and coolest place. Here's my summer version of Pouch Potatoes.
 Pouch Potatoes
The ingredients can vary, but my staples are potatoes, onions, green peppers and herbs. Start with a large rectangle of aluminum foil. Using a paper towel, spread about one teaspoon of margarine up to about one inch of the edge. Slice potatoes (enough for two servings) and place them on the foil. Top with sliced onions and green peppers. Sprinkle with salt, pepper and herbs. I like Rosemary, Thyme, Basil and Sage, but you can use whatever you like.
 Pull the foil up and seal the edges by folding them over several times. This makes a cooking pouch that should not leak. Sometimes I use a second piece of foil to double the pouch, especially when I'm going to cook them in my wood stove. But on the BBQ, a little dripping doesn't hurt a thing. Cook for about 15-20 minutes over low heat on each side to get them crispy good.
Open the pouch and dig in. This time we used them as a side dish to go with Wayne's BBQ roast. Yum! -- Margy
 I grow Snow Peas in half of a 55-gallon plastic barrel drilled for drainage. This is my second year and I've made some improvements. Last year, my homemade wood and string trellis couldn't handle the weight of the fully grown plants. This year, I found a metal trellis at Canadian Tire for $19.99 that would fit inside just fine. To that I added some extra wood stakes and twine for climbing and plant support.
 Now the Snow Pea plants have grown all the way to the top of the trellis, and it's sturdy nature is holding them up just fine. Along the way, I've had to use twine to gently tie the tall stalks to the trellis to give them some additional support. They are very fragile, so I had to be very careful.
 One good thing about peas in a barrel is I can walk all the way around for picking. The only difficult ones are at the top. I have to stand on my tippy-toes or call Wayne to reach them for me.
 So far we've had two pickings. We like to wrap the pea pods in foil pouches and put them briefly on the BBQ grill. About 5 minutes on each side is plenty to steam them to a crisp doneness. And of course, they are great raw in salads and added to a stir fry.
Do you have any other Snow Pea recipes you like? -- Margy
 Recently, we were out of bread at the cabin and didn't plan on going to town in the near future. In the winter, I bake bread with the help of my wood stove. On a warm summer day, I didn't want the extra heat. What to do? I looked at my cast iron dutch oven and thought it might do the trick.
 I mixed up a batch of Sourdough Wheat Bread dough. When it was time to put it in a warm place to rise, I heated the dutch oven on top of the stove. Once the metal gave off a nice warm glow, I turned the burner off and put my covered bowl of dough inside on top of two hot pads. I gave the metal lid an extra shot of direct heat and placed it on top. Now I had a warm "oven" to get the yeast working.
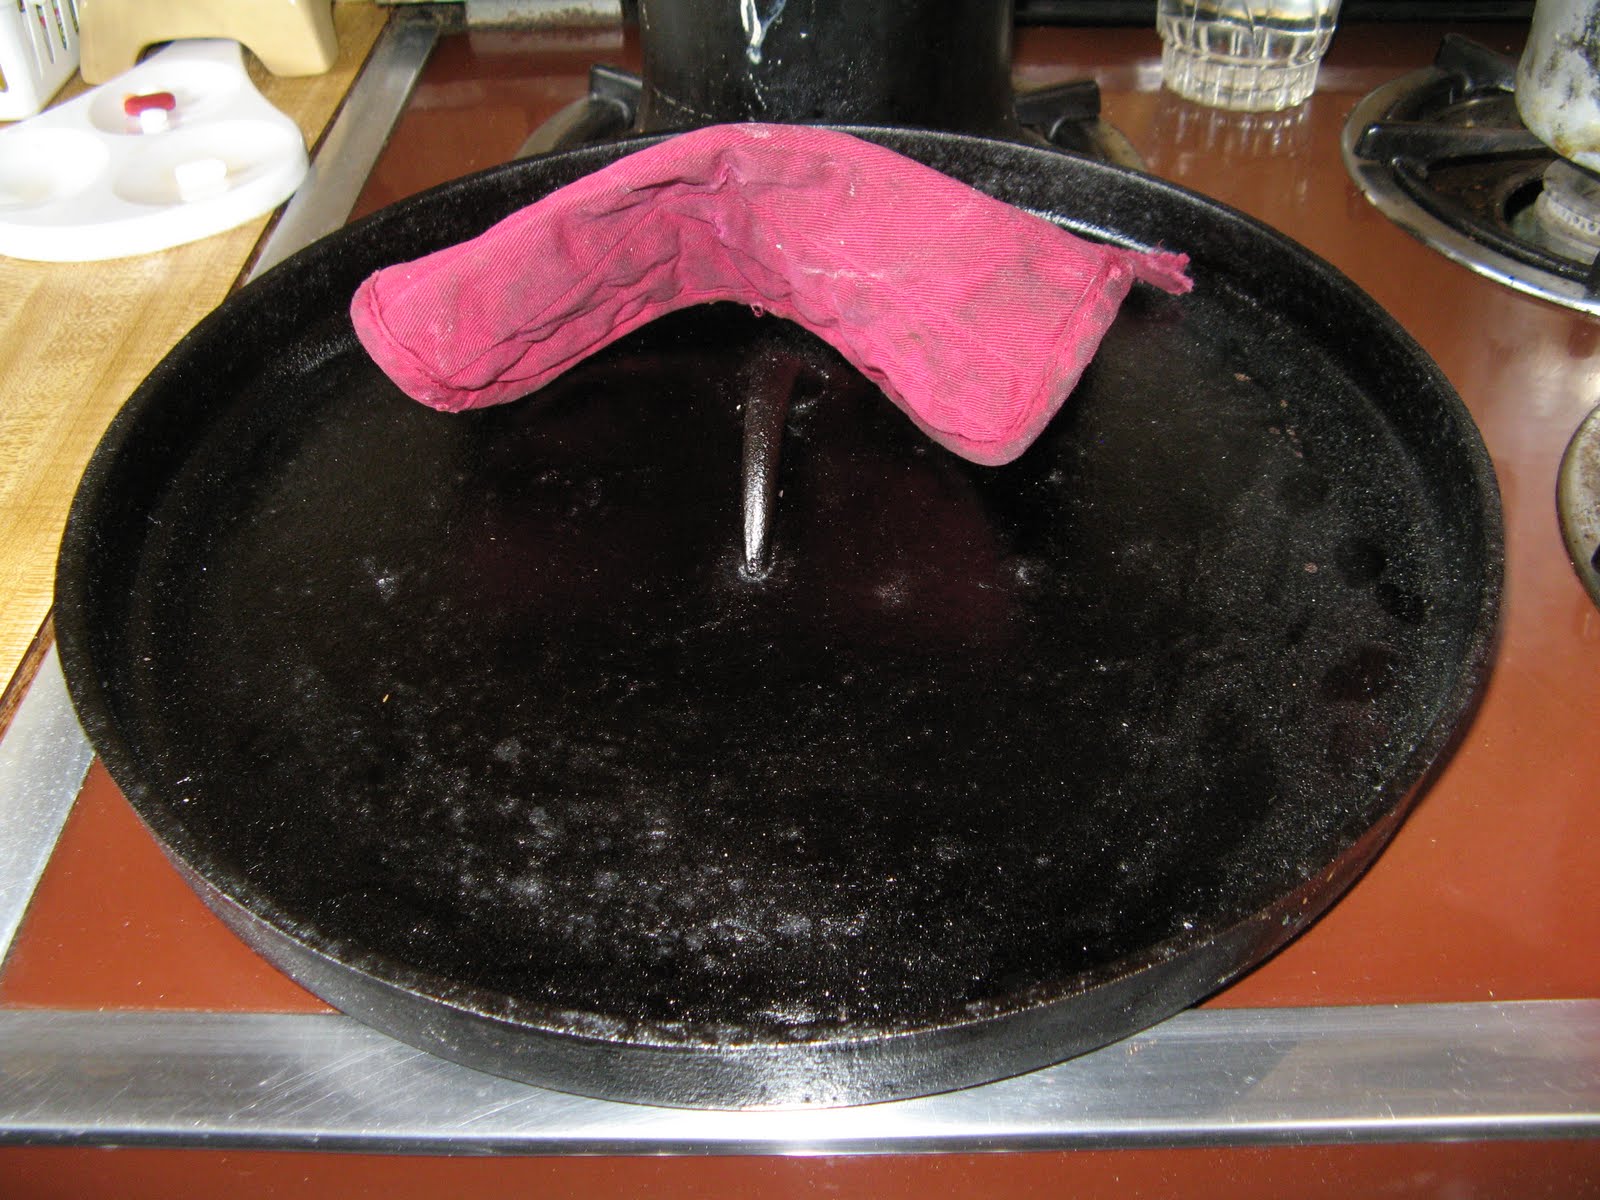 I had to reheat the lid several times to keep the temperature warm enough inside. It did take a bit longer than usual to get the dough to double in size. When it was ready, I punched it down, kneaded it and placed it in a bread pan for a second rising. I reheated the dutch oven and lid before placing the pan inside, again protected by two hot pads on the bottom.
 You may be wondering why I didn't just use my oven. Because it runs on propane, it gets very hot. Also, I have to lift out the bottom panel to relight the pilot every time I turn it on. And then there was the whole experimental process. I love finding new ways of doing things.
 In the end I had to heat up the oven on to bake the bread. But in less than half an hour I had a nice loaf to tide us over until our next trip to town. Didn't it turn out nice?
Do you have any cooking experiments you'd like to share? I'd love to hear about them. -- Margy
 My cabin kitchen has everything I need to cook a great meal, but it's a bit different than a town kitchen. Take a look at some of my unusual cooking utensils.
You might use an oven thermometer, but what about those other items? Can you guess their purpose? Here's a picture of my stove. Maybe that will give you some hints. I use the lighter most often. Because it's a propane stove, I use it to light both the burners and oven pilot light.
I was afraid of propane to begin with. Now I would say I have more of a healthy respect. Speaking of the oven pilot light, that's where the pliers come into play. It's not safe to let it stay on when the oven is not in use. Consequently, John installed a control valve on the side. It's tight to prevent leakage, so I find using pliers makes operation easier.
 I like gas for stovetop cooking. You have great control. The oven is a whole different story. Propane is much hotter than natural gas. That means the temperature control knob has no relationship to the actual temperature in the oven. That's where the oven thermometer comes in. And without any electricity, a flashlight shining through the glass door becomes my oven light.
 Even though my cooking utensils are a bit unusual, they all work together to create lots of tasty dishes. Do you have any interesting utensils that you use in your kitchen? What's their story? -- Margy
 I have two small strawberry patches in my floating garden and they are producing like crazy. That's probably because I planted a new bed last year, and replenished the other bed with established runners in the spring. In another few years, I'll need to relocate the older bed as well. What tasty treat could I make with all those berries? Why not a fresh strawberry pie.
1 cup plus 2 tablespoons flour
1/4 teaspoon salt
1/3 cup shortening
2-3 tablespoons cold water
 Mix flour and salt. Cut in shortening until it's crumbly. Stir in water slowly until the dough forms a ball. Wrap and chill before rolling out. Place in an 8" pie pan, trim to 3/4" then flute the edges. Prick the bottom and bake at 350 degrees for 20 minutes. Prick bottom again (if needed) and continue to cook until golden brown. Let cool.
1 cup strawberries mashed
1 tablespoon lemon juice
3/4 cup sugar
1/4 teaspoon salt
1/2 cup water
3 tablespoons cornstarch
3 cups whole strawberries
 Mash 1 cup strawberries, add lemon juice, salt and sugar. Heat until the juices are released. Put water and cornstarch in a container and shake well. Put some of the hot mixture in the cornstarch mix before adding it to the rest of the mashed berries. Bring to a boil stirring constantly then cook for one minute. Let cool slightly before pouring over the whole strawberries. Mound coated berries in the pre-cooked pie crust and chill. Serve with whipping cream and enjoy.
What, no picture you say? It was so good we just dove in and gobbled it down. -- Margy

Eating seasonally from my garden is fun. This month, the Powell River Living Magazine (a free publication available all over town and on the ferry) had a wonderful insert called Home Grown. It highlights local farms, markets and backyard gardens. The common theme is the bounty of produce available in our home town.

Right now my garden has a bumper crop of strawberries and my experiment of growing a rhubarb plant in a barrel is working out well. I decided to combine the two to make my first ever strawberry rhubarb pie.
8" Strawberry Rhubarb Pie

3 cups combined rhubarb and strawberries
1 cup sugar
4 tablespoons flour
1/4 teaspoon salt
2 tablespoons butter

Cut rhubarb stalks into 1/4' pieces. Discard any leaves, they are POISONOUS. Hull strawberries, cut larger ones in half. Measure fruit after prepared into a bowl. Sprinkle with sugar, flour, salt and toss until coated.
Prepare dough for a two-crust 8" pie. I used the recipe from my Fannie Farmer Cookbook.
2 cups flour
1/2 teaspoon salt
2/3 cup shortening
1/3 cup cold water
Mix the flour and salt in a bowl. Cut the shortening in with a wire whisk until it is crumbly. Stir in cold water a tablespoon at a time until the dough forms into a ball.

Work it as little as possible. Wrap and chill in the refrigerator. I tried Crisco for a change and was really pleased with the quality of my crusts. And an added benefit for cabin living, I don't need to refrigerate it. The stick variety will last even opened about 6 months on the shelf.

Roll out half the dough and place in an 8" pie pan. Trim the edges to 3/4". Fill the uncooked shell with strawberry-rhubarb mixture. Dot with bits of cold butter. Roll out the other half of dough and cut into 1" strips. Weave the strips of dough over the fruit filling into a lattice top. Crimp together, then flute the edges.

Sprinkle the top with sugar for a sweet flourish.Bake for 10 minutes at 425 degrees then reduce to 350 degrees for 30-40 minutes until the fruit filling is soft and the crust brown and crunchy. Let it cool and the juices thicken before serving with whipping cream.


Don't through those dough scraps away! Sprinkle them with sugar and cinnamon and cook them while your pie is baking. They are ready to eat hot out of the oven in about 15-20 minutes. -- Margy
 I used the cast iron griddle my good friend Betty gave me the other night to make hand made tortillas. Wayne got some masa harina (corn flour) for roast beef gravy. So, I decided to marry my new griddle, extra masa and leftover roast to make soft tacos.
The recipe on the bag just calls for masa and water. I tried a test batch and found them to be tasty but crumbly. I decided to modify the recipe to make them sturdier. Here's what I came up with.
Margy's Modified Corn Tortillas1 cup masa harina (corn flour)
2 tablespoons white flour
1/4 cup vegetable oil
1/2 cup water
 I mixed the ingredients together and refrigerated the dough for several hours before cooking. If they are too moist, add a few tablespoons of masa before rolling. I don't have a tortilla press, so I used folded plastic wrap and my rolling pin to make small rounds about 1/8" thick. The tortillas held together as long as I didn't make them too thin or too large. The batch made twelve small tortillas.
 A few minutes on each side on the hot griddle and I had tortillas. They have the sturdiness of a flour tortilla and the great taste of a corn tortilla. To keep them warm until serving, I kept them wrapped in foil. Some refried beans, my beef taco filling, shredded lettuce, cheese and salsa made a tasty meal. So much so, that we each ate four. YUM! -- Margy
 This Wednesday Friends Day post is a little different. I've already introduced you to my good friend Betty from Bellingham, better known in the blogging world as Mud Creek Mama. We met through my blog and posts on MySpace several years ago. Since then, we've met regularly for coffee and shopping in the Old Fairhaven district of Bellingham. It has been great fun meeting one of my blogging buddies.
 The last time we got together, Betty had a surprise for me. Several of my posts have been about cast iron cooking. And she brought me an extra griddle from her collection. What a wonderful thing for a friend to do. You could tell it was well seasoned from good use over the years. I love it! I couldn't wait to get it up to the cabin to try out.
 The first thing I cooked were blackberry pancakes for Wayne using my home canned berries from last year. Wayne said they were the best I've ever made. And I know the secret ingredient. It was all the love from a friend indeed.
Thanks Betty for such a special present. I will treasure it always and make some great meals with it. -- Margy
 At the recommendation of my friend Margaret (the author of Thistle Garden and owner of Magpie’s Diner) in Powell River, I grew Swiss chard for the first time last year. I planted it from seed in mid-July and had chard to harvest starting in mid-August. I kept picking leaves through the fall and didn’t have the heart to pull the plants when winter arrived.
 This spring it revived nicely, but has already started bolting. I pull the plants as needed for eating. The stems can be cooked, but I kept only the leaves. Swiss chard is an excellent source of vitamins C, K, A and B, and minerals including calcium, potassium and iron. Another great thing chard, it's low in calories, about 7 for 1 cup raw.
 You can use Chard like spinach. It has a bit stronger flavour, but goes well raw in salads or steamed. Last night for dinner I made creamed chard to go with the sirloin roast Wayne made in the barbecue.
Creamed Swiss Chard
for Two 2 pats of butter or margarine
2 thick slices of onion diced
1 wedge of green pepper diced
1 teaspoon fines herbs
1 tablespoon of flour
½ cup milk or cream
salt and pepper to taste
2 cups coarsely chopped chard Melt two pats of butter in a frying pan. Add onion, pepper and herbs, and cook on low heat until soft. Stir in flour and cook for about two minutes, but don’t let it brown. Add milk and stir until it thickens. Add salt and pepper to taste (I like Lawry’s Lemon Pepper). If the sauce is too thick, just add a little milk. Add Swiss chard and stir. It looks like a lot, but will cook down to make two nice sized servings.
 It’s so easy to make, I like to do it fresh each time. But if you like leftovers, you can increase the proportions and save some for another meal. It warms nicely with a little extra milk.
Thank you Margaret. Now I know that Swiss chard is an excellent vegetable to grow in my garden for nearly year-round fresh side dishes. Do you have any favourite Swiss chard recipes? I’d love to hear them. -- Margy
 Our asparagus is just starting to produce. I can cut the plump spears until mid-June. After that, I need to let them grow into ferns to replenish the roots for next year. My plot in the floating garden is pretty small, only about 1'X4'. Consequently, I like to use each spear to the max. I cut them carefully with a knife just below the soil level. In the kitchen I wash them and snap off the tough lower stem. They break at the tender point, but a little bit of good asparagus may remain below the split.
 I like to make fresh asparagus soup with trimmings from the bottom ends. I cut off very thin slices until I feel resistance on the knife. If there isn't enough asparagus, I cut a few more whole spears into very thin slices. To that I add two slices of onion, half a stalk of celery and a few strips of bell pepper also cut into very small bits. I bring 2 cups of water to a boil and add the veggies.
 I cook the veggies on simmer for about an hour and use a wire whisk to mash and blend them together. I like a rustic soup including the bits of veggies. (If you like a smooth soup, you can put it in a blender and strain out the pulp.) Then I cut several whole spears into 3/4 inch pieces to add at the end.
 I put 2 tablespoons flour and 1/2 cup milk in a container with a lid. Vigorous shaking blends it well. I add the milk and flour mixture to the cooked veggies and continue cooking it over low heat to thicken. I add another 1/2 cup of cream (or milk if you prefer) and the larger pieces of asparagus. Simmer long enough for the asparagus chunks to soften. Season to taste with salt, pepper and herbs (I like thyme).
 This recipe makes enough for two good size servings. I think it tastes so good because I know it came partly from my garden.
Do you have any good soup recipes? I'd love to hear about them. -- Margy